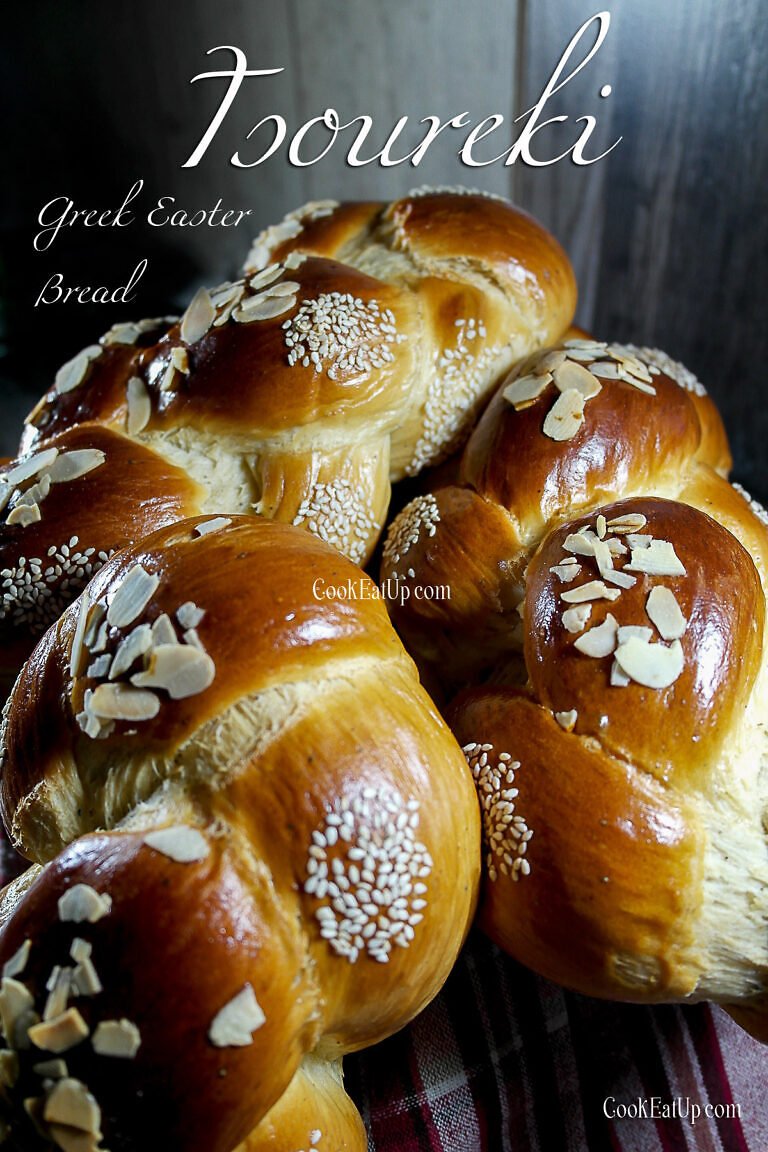
“Tsoureki”, a delicious Greek Easter Bread

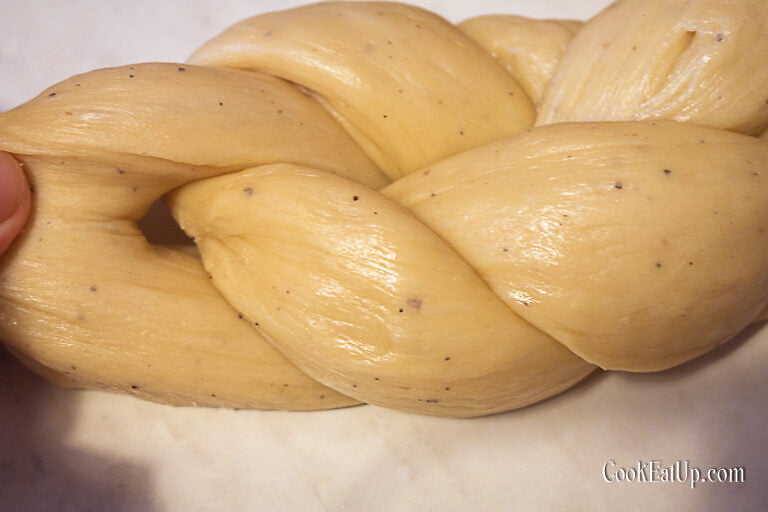
Tsoureki is a traditional Greek Easter bread. It is made on Holy Thursday along with the dyeing of the Easter eggs and eaten after midnight mass and on Easter Sunday. If you’ve never tried tsoureki before, you are missing out! It’s light yet luxurious, perfect to eat after the midnight Church service on Easter Saturday. It is made from a yeasted rich sweet dough, very similar to brioche, topped with flaked almonds and some sesame. Greek Tsoureki is a captivating sweet brioche-style bread – light, fluffy, pull apart and elastic with a soft golden crust and a stringy texture. That ‘stringiness’ when you pull away each knot or bun is what you need to look for, to assess the quality of your tsoureki. This delicious bread traditionally comes in the shape of a braid. It can be a 3 piece braid, a 4 piece braid or the simplest of all a 2 piece which is the one I prefer. After you make the braid you can make a plaited loaf or a wreath which are the most common shapes for the tsoureki.
It is flavoured with two distinct spices, mahlep and cardamom. Mastic and orange zest are also commonly used to flavour tsoureki. Some say that mastic is a must to accomplish the Tsoureki flavour. But I totally disagree with that. To me, the mahlep and the cardamom are the spices that give the tsoureki its distinct flavour and it’s A MUST if you want to make an amazing tsoureki. For those who don’t know what these aromatics are…
- Mahlep or mahaleb or mahalepi is the aromatic spice that derives from the kernel of the black or mahaleb cherry (Prunus mahaleb). It has a very strong and unique flavour really enticing. A small amount goes a long way, not just in the slightly floral flavour of the bread, but in filling Greek kitchens with the warm, nostalgic smell of Easter.
- Cardamom is one of the world’s very ancient spices. It is native to the East where it grows wild. It has a strong, sweet, pungent flavour and aroma, with hints of lemon and mint.
- Mastic or mastiha is a fascinating, resinous spice from the island of Chios in Greece. It is also known as “tears of Chios” because like other natural resins, is produced in “tears” or droplets. It releases a refreshing flavour similar to pine and cedar.
The superb aromas of these spices make this tsoureki not only delicious but also unique. But the tsoureki is not just the aroma. It is the extraordinary taste. A complete pleasure! A pleasure that all of you can make at your home with your own hands and enjoy it this Easter with your family.

It has been a long time since I initially started making tsoureki each year and this recipe is by far my favourite. The most delicious tsoureki I have ever tasted! And I know very well the taste and the texture of a good tsoureki since my hometown Thessaloniki is famous for the best tsoureki in Greece. Patisseries and bakeries when they bake tsoureki spread an amazing aroma in the city that breaks your nose and you can smell it from one mile away…
But I’ll be honest with you. Making your own tsoureki is challenging even for an experienced cook. Don’t be intimidated though, I will walk you through all of the steps to make sure your homemade tsoureki turns out perfectly! Experience has shown me that it’s all about having the right recipe! And this is a no-fail tsoureki recipe with all the preparation photos for you to succeed on your first time! It does require quite some time and effort to make. It’s not an easy nor a simple process but it does worth, both the time and effort. Although the dough is a simple yeast dough, there are some things that you have to be careful about:
- First of all, you need to have patience and a lot of free time. Tsourekia can’t be made in a hurry.
- Use only strong bread flour with a large amount of gluten. It is the only flour that is perfect to achieve the right texture of the tsoureki.
- All the ingredients should be at room temperature. This is very important for the dough to rise easier, sooner and in a proper way. The final volume should be about 1 1/2 – 2 times bigger than the initial volume of the dough.
- The first step in making tsoureki is activating your yeast and testing it to see whether it is alive. If the yeast is active you should see it bubbling up in about 6-10 minutes. If you don’t see bubbles, don’t use it as your tsoureki will turn out flat.
- If the dough seems to be sticky don’t be tempted to add more flour. It will be ok after the first rising.
- When roll the dough strings to shape the tsoureki, be gentle. Don’t use force. It is a sensitive dough and it has to be treated properly.
- If you find it hard to shape the dough because it is sticky use a little oil or melted butter on your hands. Don’t use flour.
Follow these simple but important instructions and you will get a fluffy, flavored and perfect shaped tsoureki!!!

So, are you ready? Lets get started!!!
Ingredients
- 1 kg strong white flour
- 100 g fresh yeast or 3 sachets of dry yeast
- 200 g cow butter
- 200 g lukewarm milk
- 400 g sugar
- 4 medium-sized eggs
- 1 sachet of mahlep powder (8 g)
- 1 sachet of cardamom powder (8 g)
- 1 Tbsp of vanilla extract
Depending on the flour, you may need an additional 100 -200 g. I will explain below how to figure out if you need more flour. Optionally, you can flavour with mastic or orange zest. All ingredients should be at room temperature, not cold from the refrigerator.
Preparation

In half a glass of lukewarm water, add 1 tsp of sugar along with 1 tbsp of flour and dissolve the yeast.
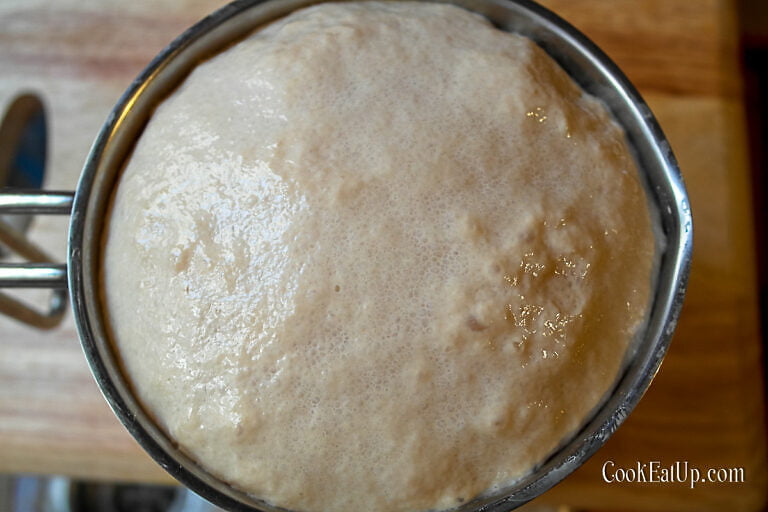
Cover it and set aside until it gets activated. It must begin to form a creamy foam on the surface.
It’s very important for the yeast to get activated. If it doesn’t foam, toss it and prepare another one! At the same time, turn on the oven at 50 C and put in the mixer bowl or the bowl that you will use to knead. This is optional if you have another way to create a warm environment. Also, the temperature depends on the oven. Mine is not very hot at 50 C. We want the oven to be warm rather than hot.

Heat the milk in a saucepan but do not bring it to boil. Add the sugar along with the milk and stir until sugar melts.

Remove the saucepan from the heat and add the melted butter, the mahlep, the cardamom and the vanilla extract.

The temperature of the mixture should be lukewarm to warm but not hot. When it has the right temperature, then beat the eggs until the whites are mixed with the yolks and add them to the mixture.
Because everyone perceives temperature differently, a nice tip is to dip your finger in the mixture and be able to leave it there until you count to ten. If you count a lot more, then heat it a little more, if you can not stand up to ten, then you need to let it cool down.
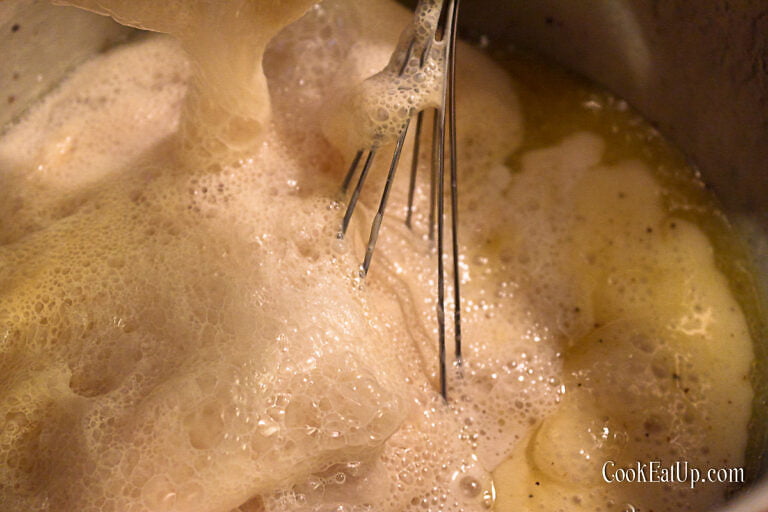
Once the yeast has foamed, add it to the mixture. Transfer the mixture to the mixer bowl or kneading bowl and add the flour. Knead until all the flour is incorporated and the dough pulls away from the sides of the bowl. Continue to knead until the dough becomes smooth, shiny and elastic. It will be slightly sticky but it doesn’t matter, because when it rises it won’t be anymore. Here’s a crucial point, if you are new to that you may have a problem. So I will try to help …
How to perceive how much flour the dough needs…
Sometimes, as with all doughs, the amount of flour we add varies depending on the gluten it contains. If the flour is not enough, the tsoureki will spread during baking. I will try to show you in the photos below, when you need to add a little more flour, in addition to the 1 kg that I suggest in the recipe. You will always add one spoon at a time, incorporating the flour into the dough and after the next, if you see that it is still needed. And don’t worry, I know very well that beginners panic about something like this and no one gets into the process of reporting this problem, as if it does not exist. But it exists and can happen to any recipe. Well, check how it works …

I will use a brand of flour, that I know in advance it is problematic, even though it is a strong white flour. As you can see in the photos, I’ve used 1 kg of flour, but it’s still like a thick porridge. It isn’t smooth and doesn’t pull away from the sides of the bowl yet.
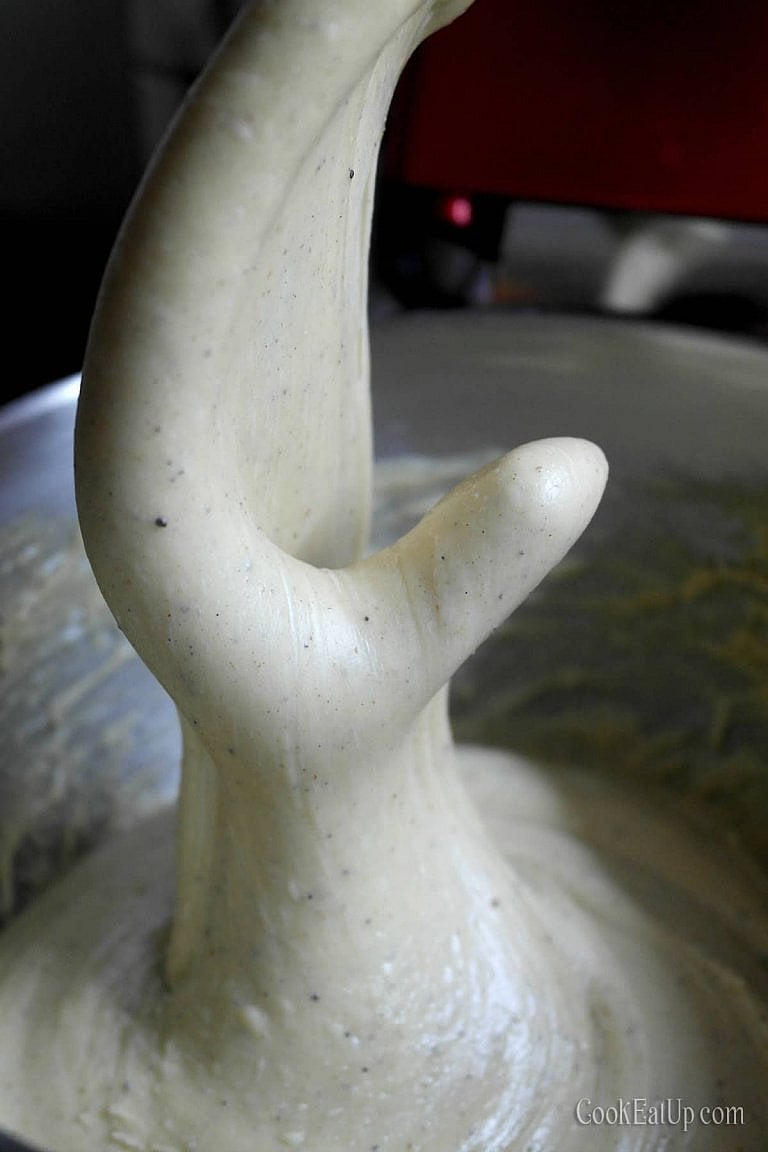
I add one tablespoon of flour and then another one. The dough starts taking shape and becomes smooth, something that is achieved not only because of the extra flour but due to the kneading as well. But it needs more, it doesn’t pull away from the sides of the bowl at all.
With one more spoon of flour, we are very close. The dough started getting very elastic and acquired strong consistency. But the dough still does not gather on the hook, although it began to pull away from the sides.

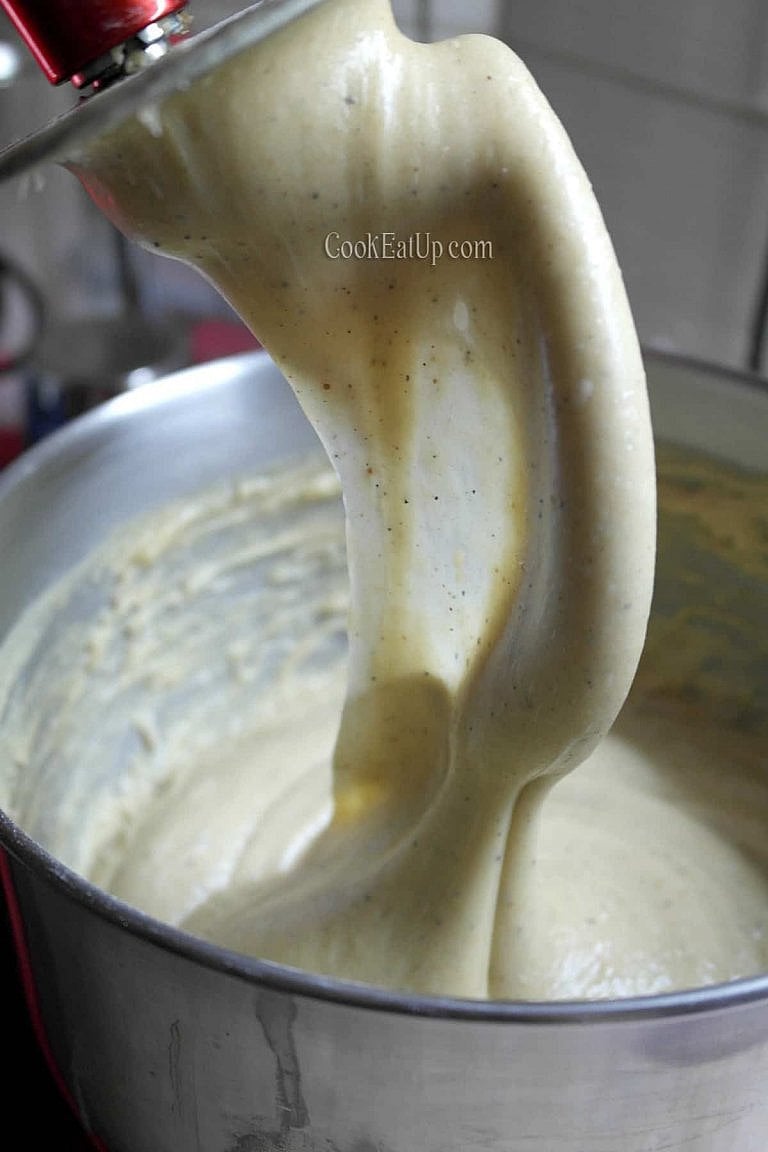
I add another spoon of flour and as you can see it starts to create this chewy texture that we need in order to create the “strings” in our tsoureki.

One last spoon and our dough is ready, as the hook rotates, it holds the dough around it. The dough has also come off the sides except for the bottom and is slightly sticky in my hands.

Rising and baking
Transfer the dough to a well-oiled bowl. Cover the dough with a towel or even better, wrap the bowl with cling film and put it in the warm oven or in a warm place to rise for about 3-4 hours. The dough is ready when its volume has at least doubled.
Although it’s a bit sticky, don’t add any more flour. In order to transfer it to the bowl, lightly oil your hands with any neutral-flavored oil.

The dough will be ready when you press it with your finger and the imprint remains, without coming back to its previous form.

So when our dough has risen, deflate it.
It is good to decide in advance what type of tsoureki you’ll make. You should have a scale next to you and you should write down how many pieces of tsoureki you’ll make and how many grams each one will be. This will save you from mistakes and delay. Let me give you an idea of what you can do with this dose.
- Two extra-large tsourekia. Prefer to shape a wreath, if you choose this size.
- Three braided tsourekia medium sized.
- Four small braided tsourekia.

Cut pieces from the dough, weigh them and make them into strings. Cover them and let them rest for half an hour, in a warm environment.
It is necessary for the strings to rest at this stage so that you can make them as long as we want. Otherwise, no matter how many times you stretch them, they will shrink again. Whenever you see this phenomenon, that is, the dough loses its elasticity, then again cover and let them rest. Tsourekia need patience and dedication. So shape the tsourekia in any way you like. The design that I love, is made with two strings and in the following way …

To make a straight braid, take two pieces of dough 200 g each. That is, for each tsoureki 2X200 = 400 g of dough. For the wreath, each string should be 400 g. That is, 2X400 = 800 g of dough. Roll two strings of dough and place them crosswise.

Take the left side of the horizontal string and place it on the right side.

Take the right side and place to the left.
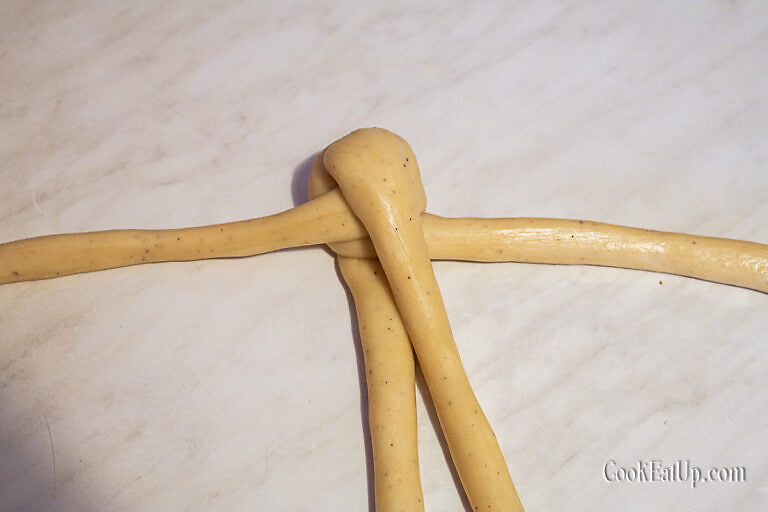
Take the top string down and then take the bottom one and place it up.

Continue the same way. The left goes right, the right goes left, the top goes down and the bottom goes up and so on. It’s a lot of fun and if something goes wrong, do not worry because no one can notice it when baked. Finally, join the edges to stick together and tack it under the tsoureki.

For the wreath, just give it a round shape when you finish braiding.
Open the loop that was created at the top of the braid and from there pass the ends of the braid that you joined together.

And it’s ready to rise.

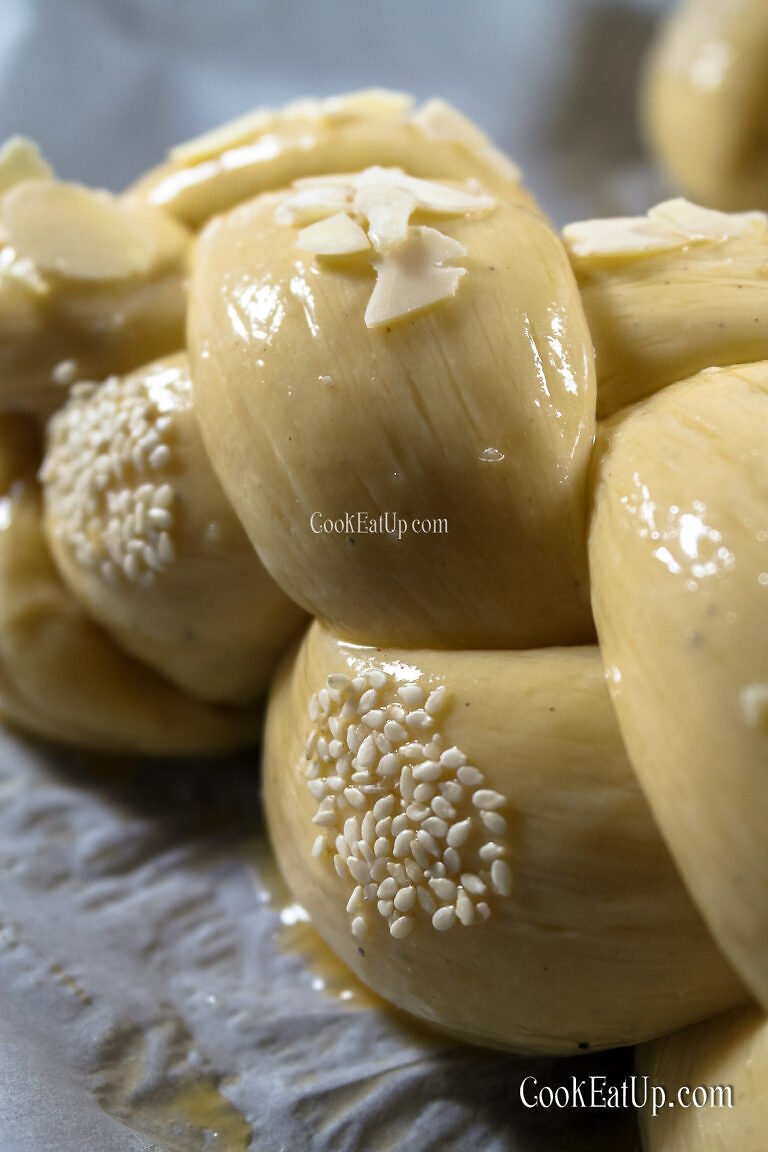
Place the tsourekia in a pan lined with baking paper and let them in a warm place to rise until they double in volume. Beat an egg with two tablespoons of water and a pinch of salt. Once the tsourekia has risen, spread the mixture on top. Wait for the egg to dry and spread once more.
Garnish with whatever you like, sesame, black seed, poppy seed, almond fillet. Try to put the whole almond, it gives great flavour!

Bake in a preheated oven at 170 C for 30-40 minutes, until brown.


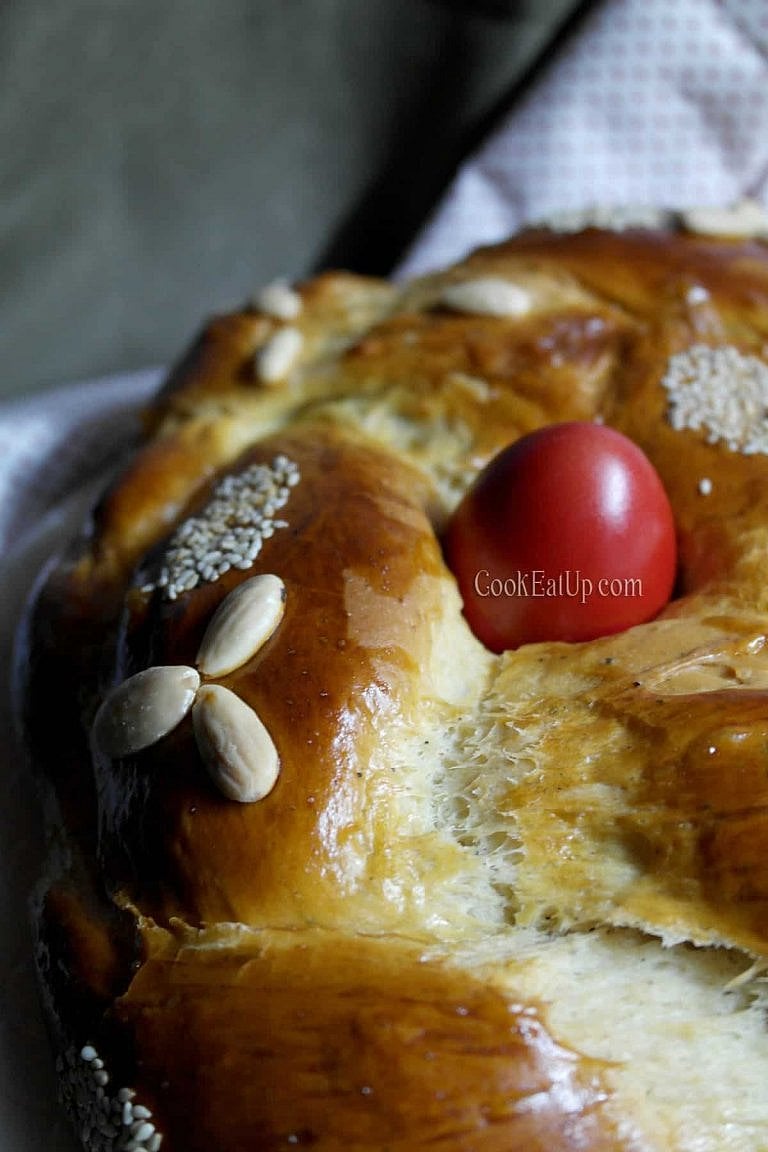
Ready! If you want to put a red egg in the centre, place it after baking, as soon as you take it out of the oven. Cooling the tsoureki will stabilize it. When hot, cover with a towel. Helps make them fluffier and softer.
Finally, if after all that we said, something goes wrong with the dough, which is unlikely, don’t throw it away! In the article “How to use a tsoureki dough that didn’t rise” you will find some awesome ideas to use it!
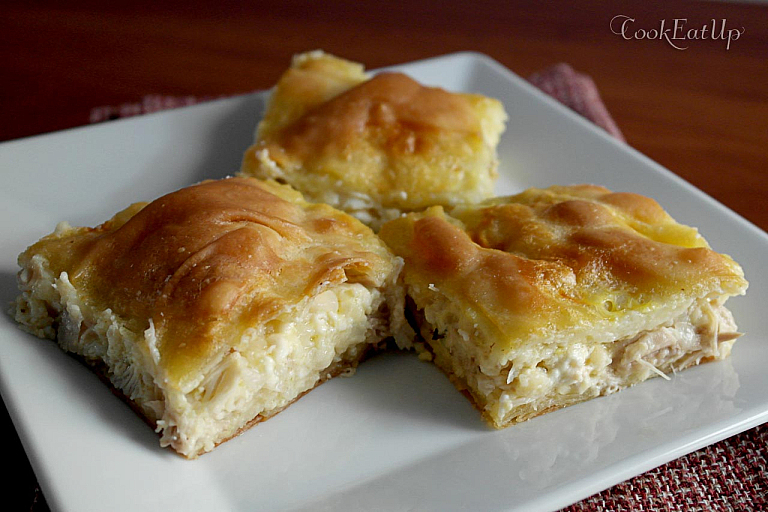
For amazing stuffed tsoureki click here
Happy baking and Happy Easter to all of you!!!
Nanà…